
Syncing an Audiomoth with the Companion App
Prerequisites
Before you start, please check you have:
- one or more Audiomoth devices
- downloaded the Companion app to your Android phone and logged in with your account
- created a project in Arbimon where the Audiomoth will be deployed
Overview
Using the Companion app to deploy a Audiomoth allows you to:
- ensure uploaded audio files are automatically matched to deployment sites in Arbimon (when using the Arbimon Uploader app)
- automatically sync locations and photos taken during the deployment into Arbimon
- pull GPS tracks to deployment sites (helpful for retrieving devices)
Deployment Steps
Ensure you have set-up your device using the Audiomoth Configurator app.
Step 1: Open the deploy checklist
Open the Arbimon Companion app and you will see a map of where existing synced recorders within a given project are deployed. Make sure you have selected the project (at the top of the screen) where you'd like to deploy the Audiomoth device. In the top left corner, the ‘Track’ button allows you to track your location while deploying your AudioMoth device. In the top right corner you can click on the search icon to search through all of the sites in a given project.

Press on the round green "+" at the bottom of the screen, and select ‘Audiomoth.’
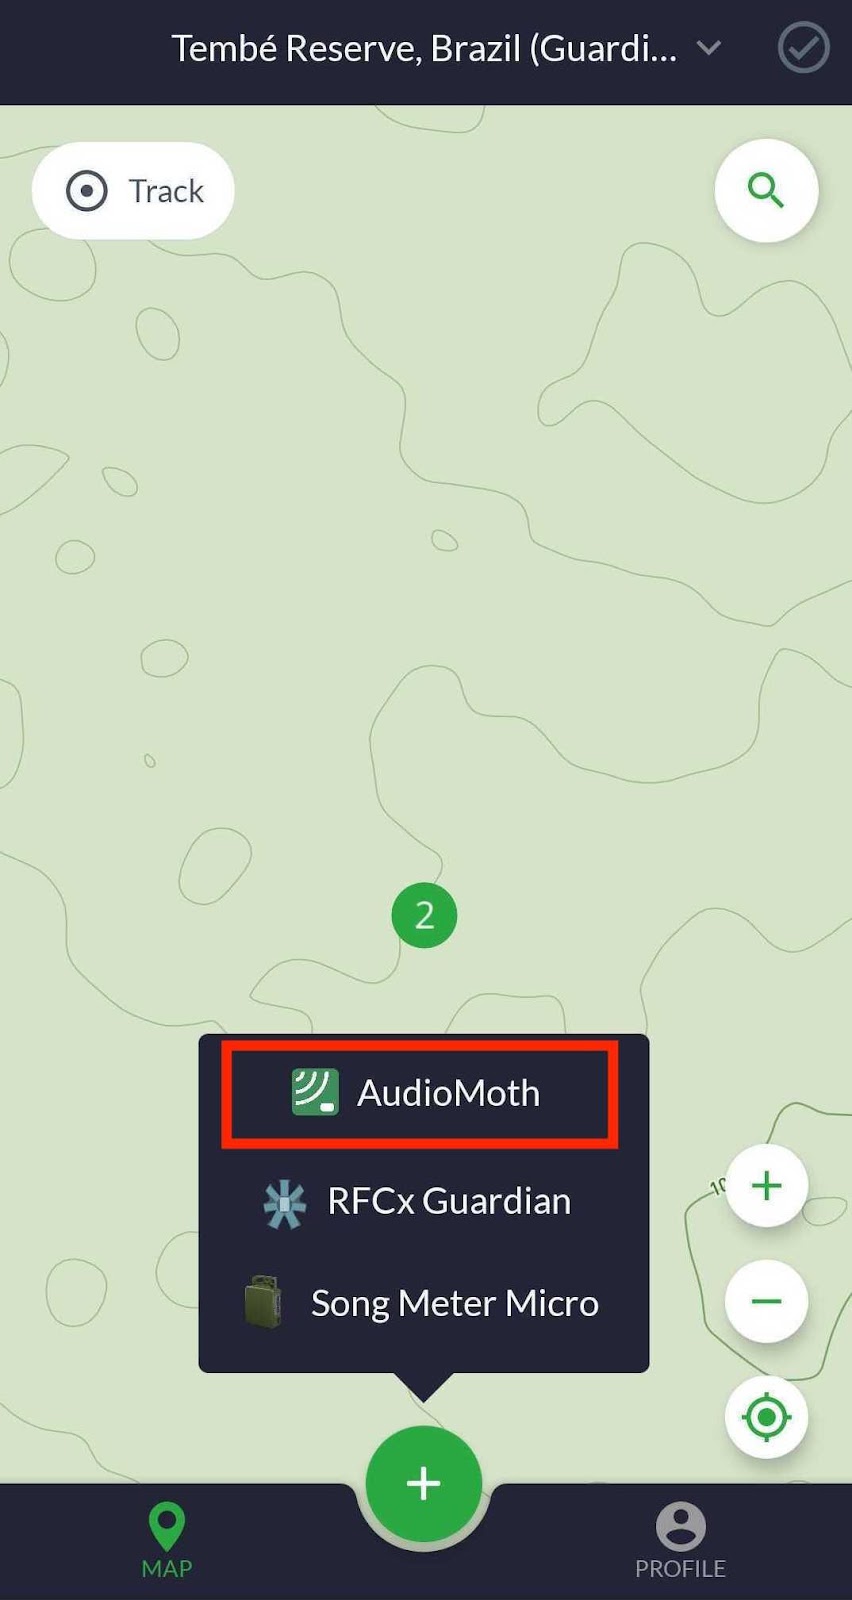
You will see the Audiomoth Setup Checklist.
Step 2: Set deployment site
From the Checklist, select "Set deployment site".

Select the site you want to deploy the Audiomoth in.

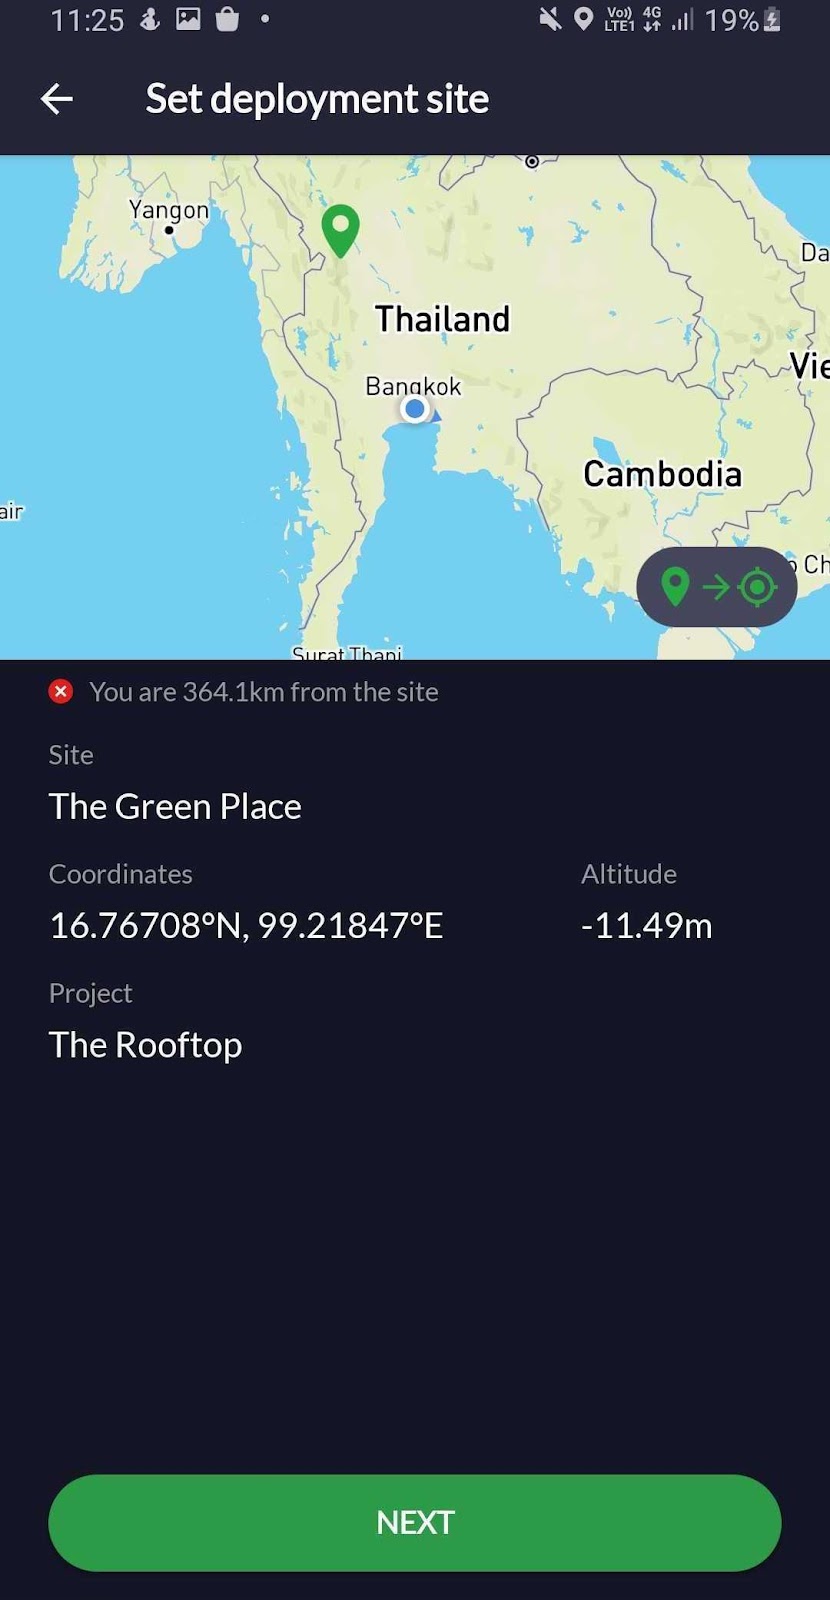
Press "Next" to set the deployment site and return to the checklist.
Step 3: Synchronize with Audiomoth
The app will walk you through a series of steps to sync the app with the AudioMoth device. Make sure the AudioMoth was configured and given a recording schedule before trying to sync. The app will play a series of tones as you progress through the sync cycle. The LEDs on the side of the AudioMoth will change when the different audios are played by the app.
Learn more about what the LED lights represent here.
Set your AudioMoth device to USB/Off, and select Begin Sync.

You should now hear a loud audio tone playing. If you can hear it, select Yes.

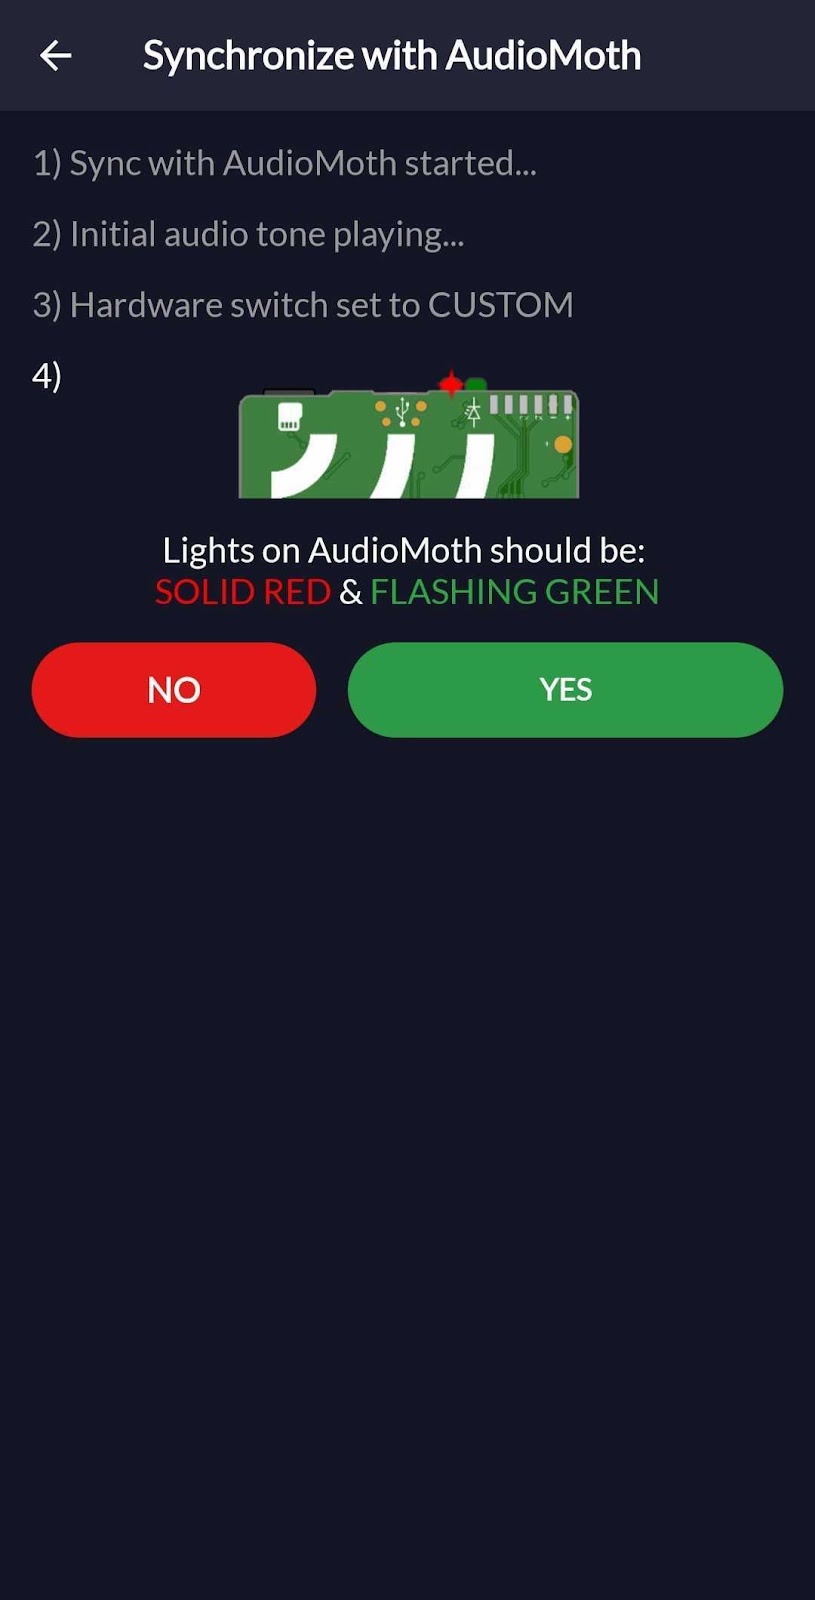
While the tone is still playing, switch your AudioMoth device from USB/Off to CUSTOM.

At this point you should be able to see a solid Red light and a flashing Green light. Select Yes to confirm.
Move your phone near the AudioMoth device, and try to minimize any background noise. Click on 'Sync To AudioMoth' and you should hear a melodic tone. Then click on 'Next.'

Confirm that the Red light is not solid by clicking on 'Yes.'
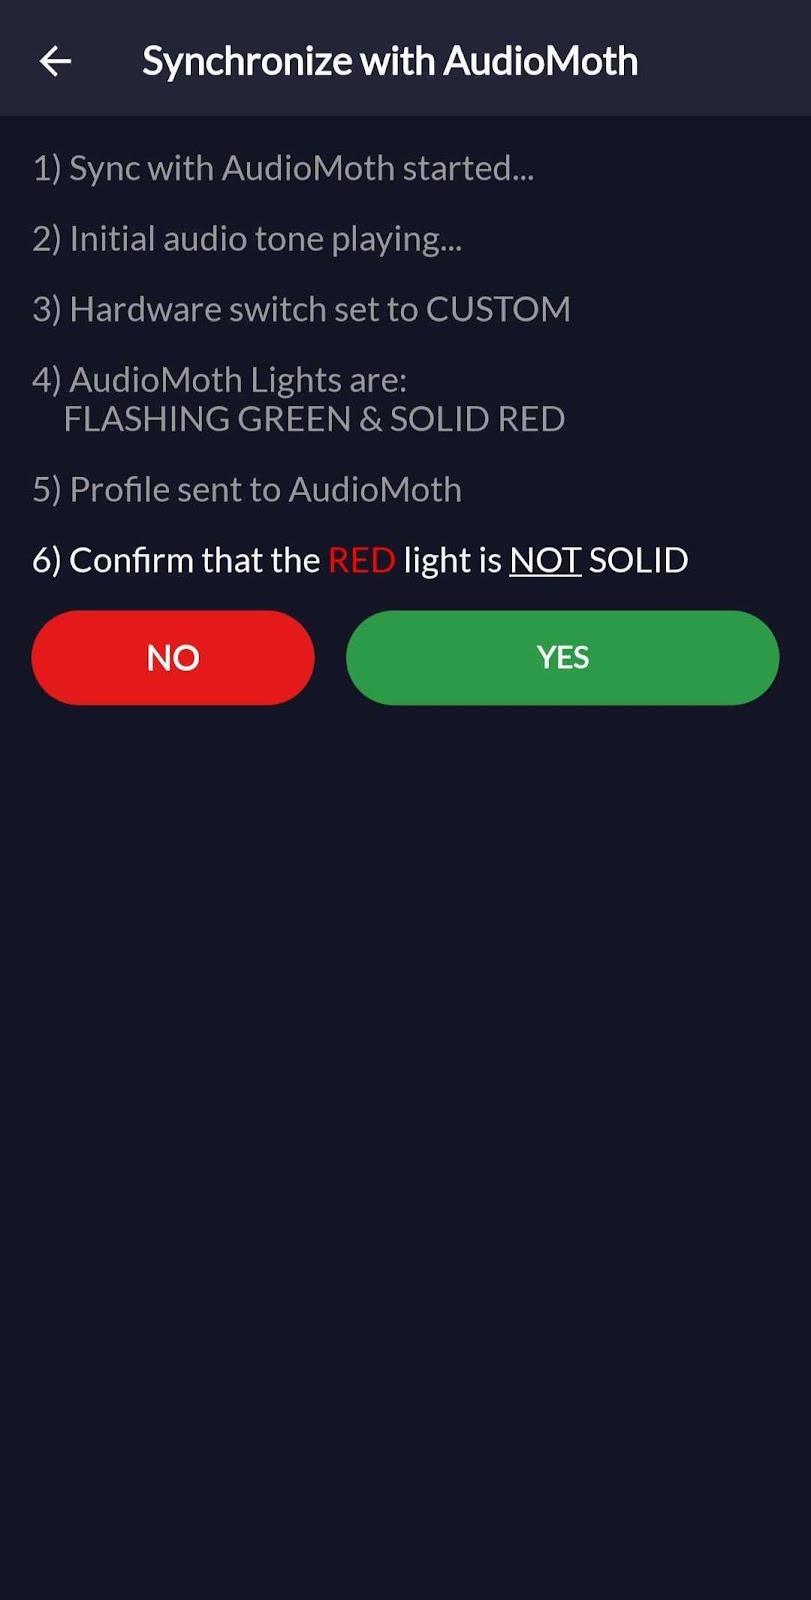
The sync steps are now completed.
Step 4: Take photos and complete deployment
You can (optionally) add photos to your deployment that will be displayed in Arbimon for reference. Select "Take Photos" of your Audiomoth and surrounding area.

You can add up to 10 photos following the guideline.

The final step is to press the "DEPLOY" button at the bottom of the Checklist. Your deployment is now complete.
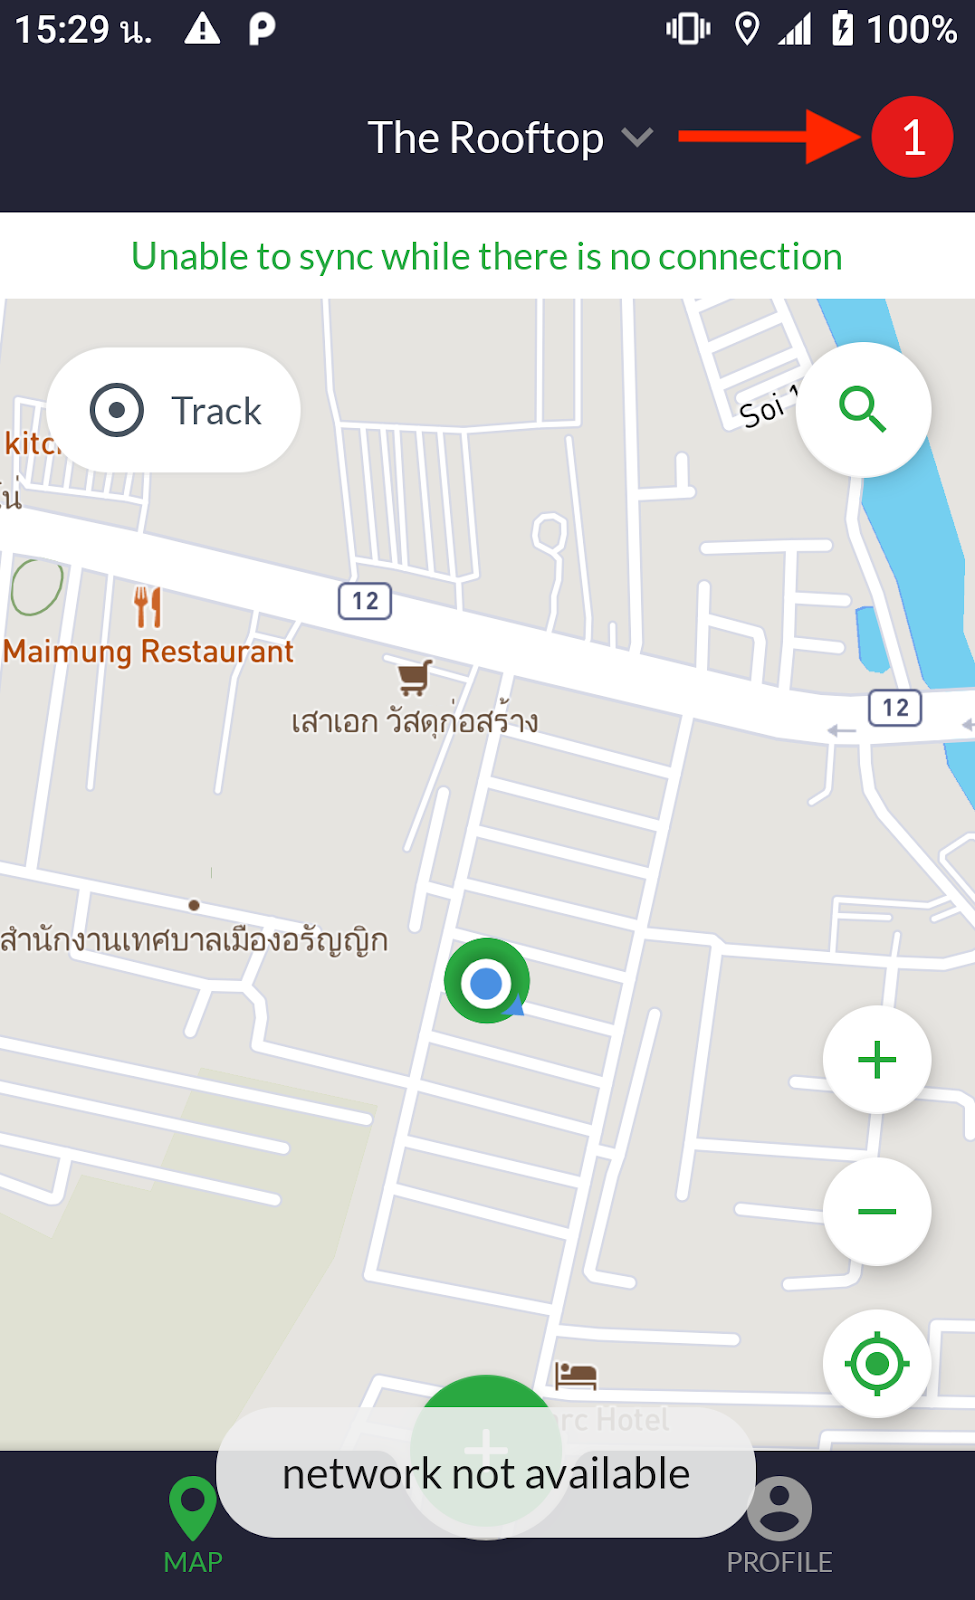
If you do not have an internet connection then the deployment is stored on your phone until a connection becomes available, when it will sync automatically. You can check the status of deployment syncing from the top right of the Map screen. When you click on the top right of the Map screen, it will show unsynced or failed deployments.
After the sync process, you will be taken back to the map. There will be a pin on the map where the new recorder was deployed.
